Six Small Experiments to Sharpen Your Chisel Skills
A gentle, step-by-step set of short experiments that teach you how to sharpen and test a bench chisel. Each exercise focuses on one small, repeatable task so you build a reliable habit.
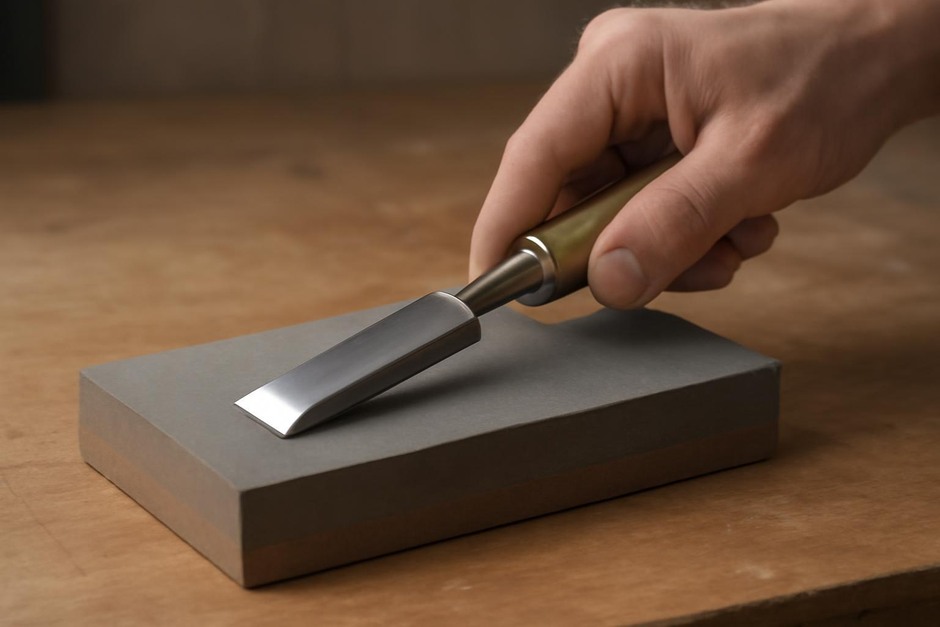
Sharpening a chisel can feel like a single mysterious task, but it breaks down into small, repeatable steps. These six short experiments let you practice one focused part of the process at a time. Each experiment takes ten to thirty minutes and uses simple tools: a few stones or a combination stone, a strop, a marker, and the chisel itself. Repeat them in sequence and you build a dependable routine rather than chasing an elusive perfect edge.
What you need
- A bench chisel (any size is fine for practice)
- A coarse, medium, and fine sharpening surface or a combined water/oil stone
- A leather strop and a stropping compound (or plain leather)
- A permanent marker
- A scrap of softwood for testing
- Optional: a small square or straightedge
How to approach these experiments
Do one experiment at a time. Keep notes: what felt different, what took longer than you expected, what produced the nicest shaving on the end test. All of these experiments emphasize a single skill so you can repeat it until it feels natural.
Experiment 1 — Observe and mark the edge (10 minutes)
Goal: learn to see and describe the bevel and the back.
- Use the marker to color the bevel of the chisel from the tip back a few millimetres.
- Look along the back and the bevel under good light. Notice any chips, high spots, or inconsistent polish.
- Try to draw the area of the true edge with the square and note where the marker rubs off first as you touch the bevel to the stone; this tells you where metal is being removed.
This experiment trains your eye to read the tool. You need to know what to change before you begin removing metal.
Experiment 2 — Flatten the back (15–25 minutes)
Goal: produce a mirror-flat back near the edge.
- Lay the back flat on a medium or fine stone and push it back and forth with light, even pressure. Keep the chisel flat; you want the last millimetre or two at the edge to become smooth and flat.
- Wipe the marker off the back to reveal where you are flattening. Continue until the marked area near the edge is uniformly removed.
A flat back is as important as a sharp bevel. Practice until you can produce a consistent polished strip at the edge.
Experiment 3 — Make a burr with a coarse grit (15 minutes)
Goal: form a thin burr along the back of the chisel by rubbing the bevel on a coarse stone at the proper bevel angle.
- Set the bevel to a modest angle (often 25–30 degrees for general chisels) and hold that angle steady as you stroke the bevel on the coarse stone.
- Check the back for a burr by running your fingertip lightly from the back toward the edge (not along the edge). You should feel a slight wire burr.
This burr tells you the bevel and back have met and that you are removing metal to the edge. The experiment reinforces steady angle control.
Experiment 4 — Refine the bevel on medium grit (15–20 minutes)
Goal: remove the coarse scratches and begin forming a keen edge.
- Move to the medium stone and repeat your strokes at the same bevel angle, taking care to remove the coarse marks.
- Use the marker occasionally to see where you are removing metal and to keep your angle consistent.
Concentrate on smooth, even strokes and a consistent number on each side if you use a back-and-forth routine. The edge should begin to bite into the test wood.
Experiment 5 — Polish and strop (10 minutes)
Goal: remove the burr and polish the edge for clean cutting.
- Use the fine stone to polish the bevel and then finish on the leather strop, pulling the bevel away from the edge. Stropping removes the burr and refines the edge to a keen finish.
- A few light passes on the strop usually make a large difference. Keep the same bevel angle and a relaxed wrist.
Experiment 6 — Test and adjust (10 minutes)
Goal: evaluate edge performance and make small corrections.
- Use the chisel to pare a thin shaving from the corner of a scrap of softwood. Look for a long continuous shaving rather than compressed fibers.
- If the cut tears rather than slices, return briefly to the fine stone or strop. If the edge chips, back up to medium grit and repeat forming the burr.
Testing teaches you to read failure and respond with the appropriate, small correction.
A short, repeatable ritual (5 minutes)
Once you have worked through the experiments a few times, adopt this daily quick routine to keep chisels ready:
- Run the back flat on the fine stone for 10–15 seconds, just to remove any small nicks.
- Give the bevel 6–8 gentle strokes on the fine stone at your usual angle.
- Strop the bevel away from the edge for 6–10 passes.
Doing this short ritual before you begin work keeps the edge responsive without major regrinding. Repeat the six experiments whenever you need to relearn a particular step or when the short routine no longer produces clean cuts.
These small, focused experiments remove the guesswork from sharpening. They encourage you to notice, practice one thing at a time, and build a short ritual that supports reliable work in the workshop.